

In this comprehensive guide, we will explore data binding in Spring MVC, a crucial feature that simplifies handling form data in web applications. Whether you are looking for a Spring MVC data binding tutorial or trying to understand best practices for form handling, this article provides step-by-step examples and detailed explanations.
Example Code
Please find the code example for This article on GitHub.
Understanding Data Binding in Spring MVC
Data binding is the process of capturing data from an incoming HTTP request (request body or query string) and mapping it to Java objects for manipulation. In this article, we will discuss the different methods of capturing data from the request and mapping it to our endpoint arguments. Without further ado, let’s begin!
1-way Data Binding
Project Setup
As usual, In this Spring MVC series, we will use a non-Spring Boot project so we can handle everything on our own. Let’s start by creating a simple Maven web project.
After creating our project, let’s add the Spring Web MVC dependency to our pom.xml and synchronize the project.
<dependency>
    <groupId>org.springframework</groupId>
    <artifactId>spring-webmvc</artifactId>
    <version>6.0.0</version>
</dependency>
To run the project, make sure to install Tomcat and deploy the project to it. If you’re using IntelliJ IDEA Ultimate, here is a guide from the official JetBrains website. After the installation deploy the project to Tomcat, then access it through the URL http://localhost:8080/project-name.
DispatcherServlet Configuration
In the previous article, The 3 Ways to Configure DispatcherServlet In Spring MVC, all the available methods to configure DS were discussed. You can choose the method that you prefer; I will go with the last one, which is the AbstractAnnotationConfigDispatcherServletInitializer approach.
public class DSConfiguration extends AbstractAnnotationConfigDispatcherServletInitializer {

    @Override
    protected String[] getServletMappings() {
        return new String[]{"/"};
    }

    @Override
    protected Class<?>[] getRootConfigClasses() {
        return new Class[0];
    }

    @Override
    protected Class<?>[] getServletConfigClasses() {
        return new Class[]{AppConfig.class};
    }
}
Here is our configuration class used for component scanning and declaring a ViewResolver Bean, which will be used by DispatcherServlet to resolve logical names to JSP Views.
@Configuration
@ComponentScan(basePackages = "com.javalaunchpad")
public class AppConfig {

    @Bean
    public ViewResolver viewResolver() {
        InternalResourceViewResolver viewResolver = new InternalResourceViewResolver();
        viewResolver.setPrefix("/WEB-INF/view/");
        viewResolver.setSuffix(".jsp");
        return viewResolver;
    }
}
Binding using @RequestParam
In this section, we will use a simple JSP page to demonstrate data binding. Our JSP page will be a registration form used by users to join an email list.
<!DOCTYPE html>
<html lang="en">

<head>
    <meta charset="UTF-8">
    <meta name="viewport" content="width=device-width, initial-scale=1.0">
    <title>Registration Form</title>
    <style>
    <!--  css -->
     </style>
</head>

<body>

<div class="container">
    <h2>Registration Form</h2>
    <form action="register" method="post">
        <label for="first_name">First Name:</label>
        <input type="text" id="first_name" value="Hamza" name="firstName">
        <label for="last_name">Last Name:</label>
        <input type="text" id="last_name" value="Nassour" name="lastName">
        <label for="email">Email:</label>
        <input type="email" id="email" value="example@javalaunchpad.com" name="email">
        <button type="submit">Sign Up</button>
    </form>
</div>

</body>

</html>
By clicking ‘Sign Up,’ the data (firstName, lastName, email) will be sent to the /register endpoint (specified by the action attribute of the form tag). The data will be sent in the request body of the HTTP request with an x-www-form-urlencoded content-type.
@Controller
public class RegistrationController {

    @GetMapping("/form")
    public String showForm() {
        return "registration";
    }

    @PostMapping("/register")
    public String register(@RequestParam String firstName,
                           @RequestParam String lastName,
                           @RequestParam String email,
                           Model model) {
        // Save the user info in the database
        // .....
        // Map the information to the success page
        model.addAttribute("firstName", firstName);
        model.addAttribute("lastName", lastName);
        model.addAttribute("email", email);
        return "success";
    }
}
In this example, our method ‘register’ will receive the data sent in the request, save it to a database (we will not handle this case, you can implement it as you want), and then add those elements to the model object so the success view can access them.
- success.jsp
<%@ page contentType="text/html;charset=UTF-8" language="java" %>
<html>
<head>
    <title>Title</title>
</head>
<body style="text-align: center">
    <h1>JavaLaunchpad</h1>
    <h2>Thank you for subscribing!</h2>
    <p>Kudos ${firstName} ${lastName} (${email})! You have successfully subscribed to the JavaLaunchpad email list. See you next week.</p>
</body>
</html>
As I discussed in the article Most Popular Spring MVC Annotations, @RequestParam is used to map a query parameter from the query string in the URL to a method argument for basic types such as String, Integer, Long, and so on. However, there is another case, like what we have now: if we use @RequestParam with an endpoint annotated with @PostMapping, we can also retrieve parameters from the request body (when using x-www-form-urlencoded content-type, of course).
Testing
To access our registration form, let’s hit our /form endpoint.

Fill in the information and click ‘Sign Up’ You will be redirected to our success page.

@RequestParam limitations for data binding & Solution !
In real-world projects, most forms will not have just 2 or 3 parameters. Using @RequestParam for each attribute in such cases would be considered a bad practice. Additionally, in many company projects, you will find tools like SonarQube used to analyze code quality using pre-set rules. One of these rules is to not exceed 7 arguments in a method. Therefore, you will need to reduce the number of arguments regardless.
The solution is to create a type to hold all this information (firstName, lastName, email) in one shot.
public class User {

    private String firstName ;
    private String lastName ;
    private String email ;

   // setters & getters
}
Update the method to take a User object as an argument instead of the three attributes separately.
@PostMapping("/register")
    public String register(User user, Model model) {
        // Save the user info in the database
        // .....
        // Map the information to the success page
        model.addAttribute("firstName", user.getFirstName());
        model.addAttribute("lastName", user.getLastName());
        model.addAttribute("email", user.getEmail());
        return "success";
    }
Sending a request to this endpoint will have the same behavior as earlier. You may ask why and how Spring handles that. Let’s explore how Spring handles this case.
here is a step-by-step workflow:
- When a request arrives with a request body containing our attributes in x-www-form-urlencoded format, Spring’s data binding mechanism kicks in.
- Spring creates a new User object using the no-arg constructor.
- For each parameter in the request body, Spring constructs a setter method based on the parameter name. It capitalizes the first letter of the parameter name and prefixes it with ‘set’. For example, if the parameter name is ’email’, Spring constructs the method ‘setEmail()’ on the User object.
- Spring then calls these setter methods on the User object, passing the corresponding values from the request to set the attributes of the User object.
Two-way data binding with @ModelAttribute
In the preceding sections, we’ve explored binding our form data to an object. However, have you ever wondered about the inverse process? What if we desire our form to be initially filled with data from an object? This is precisely what we refer to as 2-way data binding!
To handle Two-way data binding, we should utilize the Spring MVC form tag library, which is provided within the Spring MVC module. To begin using it, simply add the following declaration to your JSP page.
<%@ taglib prefix="form" uri="http://www.springframework.org/tags/form" %>Now, you will have access to Spring MVC form tags. These tags are similar to HTML tags, but instead of <form>, we use <form:form>, and for <input>, we use <form:input>, and so on. Additionally, two changes need to be made: instead of using the name attribute in <input> tags, we should use path, and in the <form> tag, we add the modelAttribute attribute (which should have the same name as the attribute in the model object). As a result, our JSP page will look like this:
<%@ taglib prefix="form" uri="http://www.springframework.org/tags/form" %>
<!DOCTYPE html>
<html lang="en">
<head>
    <meta charset="UTF-8">
    <meta name="viewport" content="width=device-width, initial-scale=1.0">
    <title>Registration Form</title>
    <style>
       // check the code source on github
    </style>
</head>
<body>

<div class="container">
    <h2>Registration Form</h2>
    <form:form action="register" method="post" modelAttribute="user">
        <label for="first_name">First Name:</label>
        <form:input type="text" id="first_name" path="firstName" />
        <label for="last_name">Last Name:</label>
        <form:input type="text" id="last_name" path="lastName" />
        <label for="email">Email:</label>
        <form:input type="email" id="email" path="email" />
        <button type="submit">Sign Up</button>
    </form:form>
</div>

</body>
</html>
The value of the input will be derived from the model attribute user. For example, in the firstName attribute, the value will be user.getFirstName(). This ensures that the form fields are initially populated with the corresponding values from the model object.
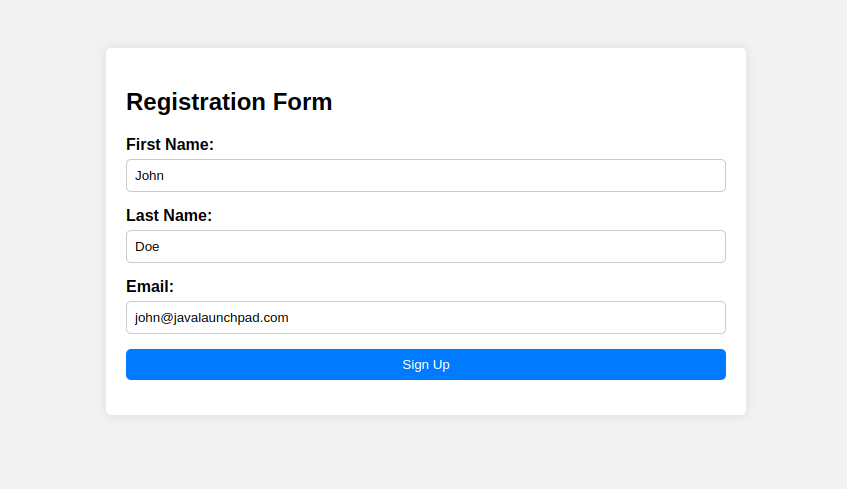
Let’s assign default values to our User object.
public class User {

    private String firstName = "John";
    private String lastName = "Doe";
    private String email = "john@javalaunchpad.com";
    // getters & setters
}
Additionally, add a User object as a model attribute to the model object as follows:
@GetMapping("/form")
    public String showForm(Model model) {
        User user = new User();
        model.addAttribute("user", user);
        return "registration";
}
If we access our /form endpoint to retrieve the form, here is what we get:
Spring Boot offers a streamlined method for adding attributes to the model object without writing a line of code. This approach involves using the @ModelAttribute annotation.
The @ModelAttribute annotation is used before a method parameter to instruct Spring to include this parameter in the model object internally.
The following code snippets demonstrate its equivalence:
- Without
@ModelAttribute
@GetMapping("/form")
    public String showForm(Model model) {
        User user = new User();
        model.addAttribute("user", user);
        return "registration";
    }


    @PostMapping("/register")
    public String register(User user , Model model) {
        model.addAttribute("user", user);
        return "success";
}- With
@ModelAttribute
@GetMapping("/form")
    public String showForm(@ModelAttribute("user") User user) {
        return "registration";
}

    @PostMapping("/register")
    public String register(@ModelAttribute User user ) {
        return "success";
}
Data Binding with Nested Objects
In certain situations, we may need to work with nested objects. To illustrate this concept, let’s use the following example:
public class User {

    private String firstName = "John";
    private String lastName = "Doe";
    private String email = "john@javalaunchpad.com";
    private Age age;
    // getters & setters
}
public class Age {
    private int  value = 0;
    private String unit = "years";
    // getters & setters
}
we’ve introduced the ‘age’ property to our User class. Since this property is an object, we need to understand how to bind incoming data to its inner properties.
In our JSP form, we’ll employ dot notation to specify nested properties. For instance:
<div class="container">
    <h2>Registration Form</h2>
    <form:form action="register" method="post" modelAttribute="user">
        <label for="first_name">First Name:</label>
        <form:input type="text" id="first_name" path="firstName" />
        <label for="last_name">Last Name:</label>
        <form:input type="text" id="last_name" path="lastName" />
        <label for="email">Email:</label>
        <form:input type="email" id="email" path="email" />
        <label for="age">Age:</label>
        <form:input type="text" id="age" path="age.value" />
        <form:input type="text" id="age" path="age.unit" />
        <button type="submit">Sign Up</button>
    </form:form>
</div>
Conclusion
In this article, we have explored how to bind form data from a request to an object and vice versa using the Spring Form Tags library. Additionally, we have explored the efficient approach provided by Spring to reduce extra lines of code using the @ModelAttribute annotation.
