

In this Spring MVC tutorial, we’ll configure the DispatcherServlet of Spring Web MVC without the need for Spring Boot. We will explore three famous approaches to do so, starting from the deployment descriptor method, then using the WebApplicationInitializer, and finally, concluding with the use of the AbstractAnnotationConfigDispatcherServletInitializer class.
Example Code
This article is accompanied by the following three code examples, each demonstrating a different configuration approach:
- XML-based configuration: GitHub Link
- Java-based configuration using WebApplicationInitializer: GitHub Link
- Java-based configuration using AbstractAnnotationConfigDispatcherServletInitializer: GitHub Link
What is DispatcherServlet?
The DispatcherServlet component is responsible for mapping HTTP requests to the appropriate handler (controller methods) and returning the result to the user. I’ve discussed in my previous article, A Closer Look at Spring MVC Architecture, the mission of the DispatcherServlet and how it works internally. Please refer to this article for more information.
This component needs to be configured to start working as expected, and that’s what we’ll be discussing in this article. The DispatcherServlet class indirectly extends the Servlet class from the Servlet API. If you’re reading this article after gaining some experience with JEE APIs, you will already be familiar with the elements that need to be configured for this servlet to intercept requests and handle them appropriately. If not, don’t worry – we will cover everything in detail in the next sections!
DispatcherServlet Configuration
Project Setup
In this article, we will use a non-Spring Boot project so we can handle everything on our own. Let’s start by creating a simple Maven web project.
After creating our project, let’s add the following dependency to our pom.xml and synchronize the project.
<dependency>
    <groupId>org.springframework</groupId>
    <artifactId>spring-webmvc</artifactId>
    <version>6.0.0</version>
</dependency>
This is the Spring Web MVC dependency that includes everything we need to start building web applications using the Spring Framework.
To run the project, we need a web server, also known as a servlet container. The most commonly used web server is Tomcat, so make sure to install it. If you’re using IntelliJ IDEA Ultimate, here is a guide from the official JetBrains website. After the installation deploy the project to Tomcat, then access it through the URL http://localhost:8080/project-name/
DispatcherServlet XML-based Configuration
If you open up your src/main folder, you will find the webapp folder, which contains the web.xml file. This file is called the deployment descriptor, which will be used by the web container (in our case, Tomcat) to handle the mapping of our DispatcherServlet (URL mapping determines which servlet should handle which request based on the URL).
<!DOCTYPE web-app PUBLIC
 "-//Sun Microsystems, Inc.//DTD Web Application 2.3//EN"
 "http://java.sun.com/dtd/web-app_2_3.dtd" >

<web-app>
  <display-name>Archetype Created Web Application</display-name>

  <servlet>
    <servlet-name>DispatcherServlet</servlet-name>
    <servlet-class>org.springframework.web.servlet.DispatcherServlet</servlet-class>
    <load-on-startup>1</load-on-startup>
  </servlet>
  <servlet-mapping>
    <servlet-name>DispatcherServlet</servlet-name>
    <url-pattern>/</url-pattern>
  </servlet-mapping>
</web-app>
Note: To ensure that the DispatcherServlet is instantiated when Tomcat starts up, you need to include the load-on-startup tag in your configuration with the value 1 (If this tag is not specified, the DispatcherServlet will only be initialized when the first request comes to Tomcat).
Using the following file, we are instructing the web container to instantiate the DispatcherServlet class with the name DispatcherServlet. The ‘/’ in the URL mapping means that this servlet will handle every request coming to our website.
If we run the project at the moment, a FileNotFoundException exception will be raised, indicating that a DispatcherServlet-servlet.xml file is not found when initializing the DispatcherServlet class. Let’s discuss why we need this file during the initialization process.
If you’re coming from my previous article, A Closer Look at Spring MVC Architecture where I already discussed that the DispatcherServlet needs some other components to work as expected (such as ViewResolver, HandlerMapping, controller objects, etc.). To create these objects so the DispatcherServlet can use them, we need a container to manage them, and this is where our WebApplicationContext comes into play. However, to start this container, we require a configuration file to guide it on which objects to instantiate, along with information about their lifecycle and dependencies. This is our missing file. Without it, we cannot initialize our WebApplicationContext. The naming convention for this configuration file is typically servlet-name-servlet.xml (e.g., dispatcherServlet-servlet.xml).
So let’s create a Spring configuration file where we will define the needed beans or perform component scanning if we are adopting an annotation-based configuration for the IOC container.
<?xml version="1.0" encoding="UTF-8"?>
<beans xmlns="http://www.springframework.org/schema/beans"
xmlns:xsi="http://www.w3.org/2001/XMLSchema-instance"
xmlns:context="http://www.springframework.org/schema/context"
xsi:schemaLocation="http://www.springframework.org/schema/beans http://www.springframework.org/schema/beans/spring-beans.xsd http://www.springframework.org/schema/context https://www.springframework.org/schema/context/spring-context.xsd">
<context:component-scan base-package="com.javalaunchpad"/>
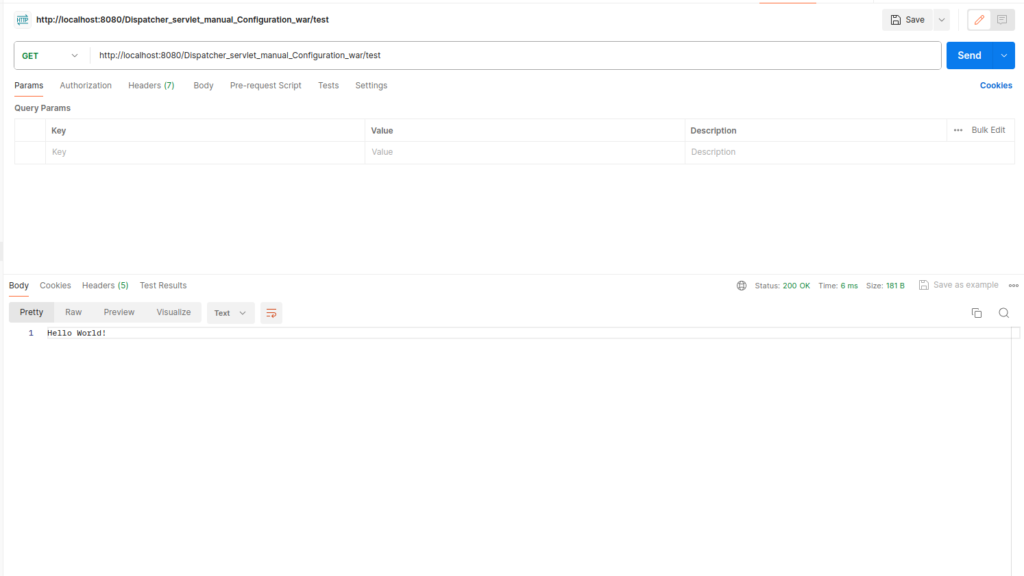
</beans>To test if our DispatcherServlet is working as expected, let’s develop a controller for testing.
@Controller
public class TestController {

    @ResponseBody
    @RequestMapping("/test")
    public String test() {
        return "Hello World";
    }

}
The @Controller annotation instructs Spring that this class is special and will be used by DispatcherServlet to handle client requests. @RequestMapping is used to simplify the process for the DispatcherServlet to understand that the method test() should be executed when someone hits the /test path. (Actually, this is the role of the RequestMappingHandlerMapping, which the DispatcherServlet consults whenever a request comes in). for simplicity, in our case, we are using @ResponseBody Annotation to Add the “Hello World” String directly to the response and prevent Spring from looking for a view called Hello World.
If you have any doubts about the basic annotations in Spring MVC, feel free to refer back to this article titled Most Popular Spring MVC Annotations.
Java Based Configuration
Alright, it’s time to get our hands dirty with some coding. Let’s kick things off by bidding farewell to the clunky XML configuration file.
To configure the DispatcherServlet using a Java-based approach, we’ll follow these steps:
- Create a class that implements the
WebApplicationInitializerinterface:
public class DSConfiguration implements WebApplicationInitializer {
    @Override
    public void onStartup(ServletContext servletContext) throws ServletException {
    }
}
This interface requires us to override only one method.
- Next, let’s create a
WebApplicationContext:
 AnnotationConfigWebApplicationContext rootContext = new AnnotationConfigWebApplicationContext();
 rootContext.register(AppConfig.class);
Since we’re opting for the AnnotationConfigWebApplicationContext, we’ll provide it with a configuration class instead of an XML file. Therefore, it’s time to bid adieu to the XML configuration (DispatcherServlet-servlet.xml) we used before and create a new configuration class.
@Configuration
@ComponentScan(basePackages = "com.javalaunchpad")
public class AppConfig {
}
This configuration file does exactly what the XML file did before.
- Now, let’s create and register the DispatcherServlet:
 DispatcherServlet dispatcherServlet = new DispatcherServlet(rootContext);
 ServletRegistration.Dynamic dispatcher = servletContext.addServlet("dispatcher", dispatcherServlet);
dispatcher.setLoadOnStartup(1);
dispatcher.addMapping("/");
The result will resemble something like this:
public class DSConfiguration implements WebApplicationInitializer {
    @Override
    public void onStartup(ServletContext servletContext) throws ServletException {
        AnnotationConfigWebApplicationContext rootContext = new AnnotationConfigWebApplicationContext();
        rootContext.register(AppConfig.class);
        DispatcherServlet dispatcherServlet = new DispatcherServlet(rootContext);
        ServletRegistration.Dynamic dispatcher = servletContext.addServlet("dispatcher", dispatcherServlet);
        dispatcher.setLoadOnStartup(1);
        dispatcher.addMapping("/");

    }
}
let’s test again:

You might be wondering, is there an even simpler method to handle this configuration?
Using AbstractAnnotationConfigDispatcherServletInitializer
In Spring MVC, there’s an even more streamlined approach to configure the DispatcherServlet using the AbstractAnnotationConfigDispatcherServletInitializer class. Let’s take a look at how we can utilize it:
public class DSConfiguration extends AbstractAnnotationConfigDispatcherServletInitializer {

    @Override
    protected String[] getServletMappings() {
        return new String[]{"/"};
    }

    @Override
    protected Class<?>[] getRootConfigClasses() {
        return new Class[0];
    }

    @Override
    protected Class<?>[] getServletConfigClasses() {
        return new Class[]{AppConfig.class};
    }
}
Believe it or not, this is all we need to get our DispatcherServlet up and running! The AbstractAnnotationConfigDispatcherServletInitializer class abstracts away much of the configuration process, making it incredibly simple and concise.
By extending this class, we’re able to specify the servlet mappings and configuration classes with just a few overridden methods. This level of abstraction significantly reduces the boilerplate code required for setting up the DispatcherServlet.
How does Spring Boot Autoconfigure DispatcherServlet?
In Spring Boot, the magic of Autoconfiguration simplifies the process of setting up our application by handling much of the configuration automatically.
So, what exactly is autoconfiguration?
Autoconfiguration involves a set of classes provided by the Spring team. These classes, known as configuration classes, contain predefined bean definitions necessary to kickstart various modules. For instance, in a Spring Boot project utilizing Spring Web, there exists a configuration class responsible for autoconfiguring the web module. This class dynamically creates beans based on certain conditions, ensuring that the necessary components are configured only when needed. For example, it might create the DispatcherServlet bean only if the Spring Web MVC module is included in the project’s pom.xml.
To delve deeper, if you explore the source code of Spring Boot, particularly within the web package, you’ll encounter the DispatcherServletAutoConfiguration class. This class plays a pivotal role in autoconfiguring the DispatcherServlet by defining all the essential beans required for its configuration and instantiation.
Conclusion
In this article, we’ve delved into the intricacies of configuring the DispatcherServlet in a Spring MVC application. Initially, we started with the traditional XML-based configuration, then transitioned to exploring the Java-based approach using WebApplicationInitializer. Finally, we discovered the streamlined method provided by AbstractAnnotationConfigDispatcherServletInitializer, which abstracts much of the configuration process.

5 responses
Could you please update the URL for ‘A Closer Look at Spring MVC Architecture’? The current link is incorrect
in Java-based configuration using WebApplicationInitializer, if we have Tomcat 10+
=>
jakarta.servlet
jakarta.servlet-api
5.0.0
provided